

How to make a giant cheater quilt
Posted by Lisa Leleu on
Who doesn't like to snuggle up on the sofa, with a nice, soft (and warm!) blanket during the colder days? And who doesn't like a blanket, featuring your favourite colours, animals or even food?
I sure do! That's why I made this giant cheater quilt, that measures 300 x 270 cm!

First of all: what is a cheater quilt?
A cheater quilt is a quilt, made from a pre-printed patchwork design, which means you will not have to sew all the small pieces of fabric together.
To make this cheater quilt, I used our very own cheater quilt fabric (http://tinyurl.com/5au2vv7w) and a fleece backing.
Why did I use a fleece backing?
I used a minky fleece backing for this quilt, purely for the warmth and the cuddly factor it would give the blanket.
What do you need to make this awesome quilt?
First of all some basics:
-fabric scissors (or very sharp scissors)
-measuring tape
-sewing thread (I used white, as I used a lot of different colours in the quilt and because the fleece backing is white). Pro tip: make sure to make fill up a lot of bobbins before you start. I filled about 6 beforehand.
-sharp pins
-iron
Other essentials:
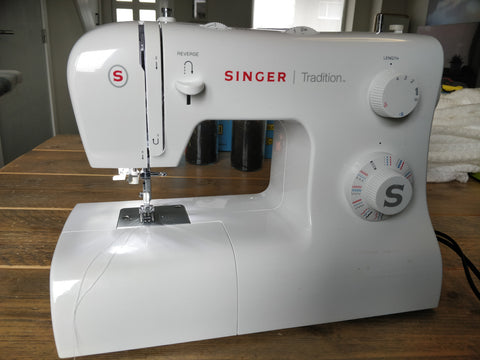
-sewing machine
-desired number of cheater quilt pieces of fabric (number of pieces depend on how big you want your blanket to be). Make sure these are washed and ironed before use! Get your fabric here: http://tinyurl.com/5au2vv7w

-minky fleece fabric (I ordered this one from Le Chien Vert: bit.ly/3hEkcZM). Calculate your finished size (starting from the pieces of printed fabric) and add 10 cm on all sides, to get the amount of fabric you need.
This fleece it is 220 cm wide, which means you will not have to sew pieces of fleece together, but use one big piece.

-strong coffee

Optional:
-serger

Now on to the real work!
- Pin the pieces of fabric together. Make sure you line up the designs as perfectly as possible, because you will sew them together along the border between the design and the white border, where the design stops.
Pro tip: the fabric is a bit transparent, which will help you to line the pieces of fabric up, especially if you hold them up to the light.
Make sure that directional designs are facing the same direction. You will pin them right sides together, but make sure to check the direction first!

- Sew those pieces together along the line between the fabric and the white border.

- If you have a serger, you can serge the pieces you have sewn together. If you don't and you want to finish your seams neatly, you can use a zigzag stitch on your sewing machine.

- Iron all of the seams you made to one side, so that they are nice and flat and do not add too much bulk to the quilt. You now have one large piece of fabric.


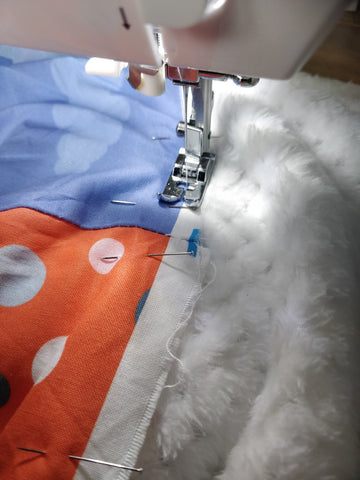
- Lay out the fleece fabric and put the fabric on top (wrong sides together: fabric with the designs up and fleece with the good side down). Make sure everything is nice and flat and without wrinkles. Put the fabric on the fleece, so that you have about 10 cm of fleece left on the top and the bottom and 5 cm on both sides.

- Pin all of the fabric onto the fleece. Make sure you work in rows and straighten out the fabric, so that the fabric and the fleece are always flat.

- Sew the fabric to the fleece, exactly on the line between the fabric and the white border.
- Once you have secured one length, you can then proceed to sew all of the other seams. This means you will firstly sew all of the horizontal lines. Make sure you have pinned all of those lines straight onto the fleece. Once you have finished all of the horizontal lines, you can sew all of the vertical lines, thus creating the squares of your quilt.

Pro tip: as you get closer to the middle of the quilt, you will have a lot of fabric that has to pass under your sewing machine. Not all machines have a lot of room on the right of the needle, so rolling up the right side of the quilt will make your life much easier!
- Now that the fabric is fully attached to the fleece backing, you can finish the edges of the fleece. To do so, firstly, cut the fleece fabric from the top and the bottom, so that there is 5 cm of fleece left all around the main fabric. I serged those raw edges of the fleece, but you can also use a zigzag stitch on your regular sewing machine. Next, fold over the fleece onto the right side of the fabric, overlapping the print by a couple of mm's. Fold the unprinted (white) part of the fabric inside the fleece, because that will give the border some reinforcement. Pin the border in place. Start by doing this on two opposite sides and leave the other two unpinned for now.

- Sew the fleece border onto the fabric, making sure to sew as close to the edge as possible.

- Fold the remaining open edges in the same manner as in the previous step and fold the corner on top of the edge that you already sewed. Pin everything together to secure and sew.
- That is it! Make sure to check for stray pins, because you will have used quite a lot of them and you really don't want to leave any behind!
Now enjoy your blanket!

I hope you enjoyed this tutorial and that you will be able to make your own cheater quilt!
What kind of designs would you use? Which colours do you prefer? Let me know below!
Feel free to ask any questions or share your thoughts in the comments below!