Hoe maak je een gigantische cheater quilt
Gepost door Lisa Leleu op
Wie ligt er niet graag in de zetel, met een lekker zacht (en warm!) dekentje tijdens de koudere dagen? En wie houdt er niet van een deken met je favoriete kleuren, dieren of om het even welke print?
I sure do! That's why I made this giant cheater quilt, that measures 300 x 270 cm!

Eerst en vooral: wat is een cheater quilt?
A cheater quilt is a quilt, made from a pre-printed patchwork design, which means you will not have to sew all the small pieces of fabric together.
To make this cheater quilt, I used our very own cheater quilt fabric (http://tinyurl.com/5au2vv7w) and a fleece backing.
Waarom heb ik een achterkant van fleece gemaakt?
Ik heb voor deze quilt een minky fleece achterkant gebruikt, puur voor de warmte en de knuffelfactor die het de quilt geeft.
Wat heb je nodig om deze geweldige quilt te maken?
Eerst en vooral een aantal basisbenodigdheden:
-stofschaar (of hele scherpe schaar)
-lintmeter
-sewing thread (I used white, as I used a lot of different colours in the quilt and because the fleece backing is white). Pro tip: zorg ervoor dat je veel bobijntjes vult voordat je begint. Ik heb er ongeveer 6 van tevoren gevuld.
-scherpe spelden
-strijkijzer
Overige benodigdheden:
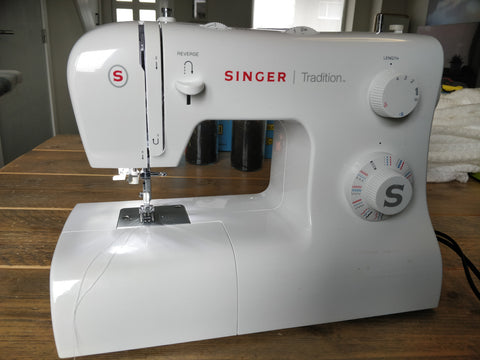
-naaimachine
-gewenst aantal cheater quilt stukken stof (het aantal stukken is afhankelijk van hoe groot je je deken wilt hebben). Zorg ervoor dat deze gewassen en gestreken zijn voor gebruik! Koop je stof hier: http://tinyurl.com/yzj5cbs4

-minky fleece fabric (I ordered this one from Le Chien Vert: bit.ly/3hEkcZM). Calculate your finished size (starting from the pieces of printed fabric) and add 10 cm on all sides, to get the amount of fabric you need.
This fleece it is 220 cm wide, which means you will not have to sew pieces of fleece together, but use one big piece.

-sterke koffie

Optioneel:
-overlockmachine

Nu op naar het echte werk!
- Speld de stukken stof aan elkaar. Zorg ervoor dat je de ontwerpen zo perfect mogelijk uitlijnt, omdat je ze langs de rand tussen het ontwerp en de witte rand aan elkaar zult naaien, waar het ontwerp stopt.
Pro tip: the fabric is a bit transparent, which will help you to line the pieces of fabric up, especially if you hold them up to the light.
Zorg ervoor dat ontwerpen met een bepaalde richting in dezelfde richting wijzen. Je speldt ze met de goede kanten op elkaar, maar controleer eerst de richting!

- Naai die stukken stof samen langs de lijn tussen de stof en de witte rand.

- Als je een overlockmachine hebt, kun je de stukken die je aan elkaar hebt genaaid afwerken met een locksteek. Als je er geen hebt en je wilt je naden netjes afwerken, kun je een zigzagsteek op je naaimachine gebruiken.

- Iron all of the seams you made to one side, so that they are nice and flat and do not add too much bulk to the quilt. You now have one large piece of fabric.


- Leg de fleecestof uit en leg de stof er bovenop (verkeerde kanten op elkaar: stof met de ontwerpen naar boven en fleece met de goede kant naar beneden). Zorg ervoor dat alles mooi vlak ligt en zonder rimpels. Plaats de stof op de fleece, zodat je ongeveer 10 cm fleece overhoudt aan de boven- en onderkant, en 5 cm aan beide zijden.

- Speld de volledige stof vast op de fleece. Zorg ervoor dat je in rijen werkt en de stof recht houdt, zodat de stof en de fleece altijd plat liggen.

- Sew the fabric to the fleece, exactly on the line between the fabric and the white border.
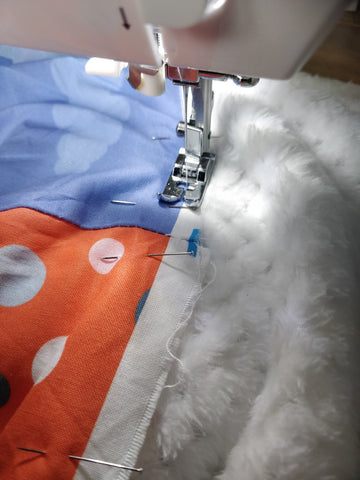
- Nadat je één lengte hebt vastgezet, kun je doorgaan met het naaien van alle andere naden. Dit betekent dat je eerst alle horizontale lijnen zult naaien. Zorg ervoor dat je alle lijnen recht op de fleece hebt gespeld. Nadat je alle horizontale lijnen hebt afgemaakt, kun je alle verticale lijnen naaien, waardoor je de vierkanten van je quilt creëert.

Pro tip: naarmate je dichter bij het midden van de quilt komt, heb je veel stof die onder je naaimachine door moet. Niet alle machines hebben veel ruimte aan de rechterkant van de naald, daarom kan het oprollen van de rechterkant van de quilt je leven een stuk gemakkelijker maken!
- Now that the fabric is fully attached to the fleece backing, you can finish the edges of the fleece. To do so, firstly, cut the fleece fabric from the top and the bottom, so that there is 5 cm of fleece left all around the main fabric. I serged those raw edges of the fleece, but you can also use a zigzag stitch on your regular sewing machine. Next, fold over the fleece onto the right side of the fabric, overlapping the print by a couple of mm's. Fold the unprinted (white) part of the fabric inside the fleece, because that will give the border some reinforcement. Pin the border in place. Start by doing this on two opposite sides and leave the other two unpinned for now.

- Naai de fleece rand op de stof, en zorg ervoor dat je zo dicht mogelijk bij de rand naait.

- Vouw de overgebleven open randen op dezelfde manier als in de vorige stap en vouw de hoek over de rand die je al hebt genaaid. Speld alles vast om te beveiligen en naai.
- Dat is het! Zorg ervoor dat je controleert op verdwaalde spelden, want je hebt er heel wat gebruikt en je wilt er echt geen achterlaten!
Geniet van je deken!

I hope you enjoyed this tutorial and that you will be able to make your own cheater quilt!
Wat voor soort ontwerpen zou jij gebruiken? Welke kleuren hebben jouw voorkeur? Laat het me hieronder weten!
Feel free to ask any questions or share your thoughts in the comments below!